A hardwood flooring installation can be the perfect project for your living room, bedroom or even a basement. It catches the eye and conveys a timeless look that many homeowners and potential homeowners value. The good news is that it's possible to tackle this project on your own. With a bit of planning for your budget and figuring out the style you're aiming for, you can have this project done in no time!
Perhaps you want to replicate a beautiful wood floor layout pattern you saw online, or maybe you wish to install hardwood floor on concrete and are unsure how to start. There are a few things you need to consider in order to make your hardwood flooring installation a success. Here's what you need to know.
In addition to choosing a species of wood, which is more about aesthetics than installation, there are three main kinds of hardwood flooring available. Only two are ideally suited to the do it yourselfer, unless you have a lot of expertise on the subject. Here are the available options:

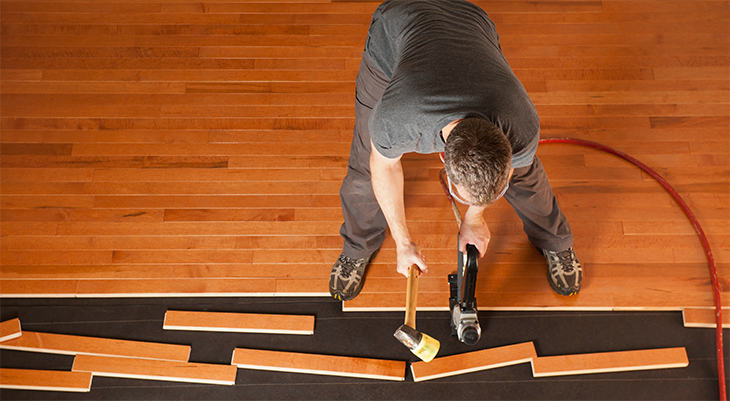
Whenever installing hardwood flooring, it's always a good idea to follow the instructions that the manufacturer included with the hardwood you've purchased. Here are some simple to follow guidelines on how to prepare and install the hardwood floor boards.

Once you've finished installing the wood boards, you'll likely have a lot of dust and debris that needs to be cleaned up. The dust can be sweeped or vacuumed up with a shop vacuum. As for the old subfloor, broken boards, and other debris, you can have them hauled away to your local dump.
Renting a dumpster to be placed conveniently on your driveway for the duration of your project will make it easier to remove the junk once you're ready to clean up. Once the dumpster is filled you can have it picked up and taken away. Bin There Dump That will conveniently clean the area around your dumpster to ensure no debris is left behind.
Our Dumpster Consultants are waiting to help you find an affordable solution to your waste disposal needs; we can't wait to help you with your Hardwood Flooring Installation Project!
Setting up the right environment for your new hardwood floors is also critical to their long-term beauty. For example, if your environment has a lot of dust, it's best to go with a pre-finished option rather than a finish in place. In addition, UV light can also cause your hardwood floor to fade or change shades. We recommend window treatments and rugs to help with this issue.
The temperature of the room is also a factor that can affect the wood boards. Before installing, make sure to leave the boards in the room for a few days to get them acclimated to the temperature. This way they wont become damaged once you start working with them.
To install hardwood floor on concrete directly, you'll need to keep in mind that it is a slightly different process than doing it directly on a subfloor. Moisture levels and the age of the concrete make it a bit tricky to install the floor directly on to the concrete. Damp flooring can create mold and damage the wood.
You may need to grind the concrete to rid it of paint or glue to prepare it for the wood. Snap the wood boards into place, ensuring they sit under the baseboards. When you plan to install hardwood floor on concrete, it's not recommended to attach the boards directly onto the concrete. Instead, build a plywood subfloor ontop of the concrete, and then install the hardwood on top of the plywood.

You don't want to lay hardwood directly over a squeaky subfloor floor as it will continue to squeak after the project is complete. The squeaky sounds is likely coming from the separation of the subfloor from the floor joists. If you find a squeaky sub floor, you can solve the problem using a nail.
Hammer the nail in the area you hear the squeak to connect the subfloor back to the joist. Use a nail that is long enough to reach the joist. This should ensure the two boards are connected well and will prevent them from squeaking when you walk over them.
We hope this helps you make some key decisions on your hardwood flooring project. When you're ready to get started, visit our ordering page to rent the dumpster you'll need to toss out the debris you'll have during your project.
Friendly, professional customer service, plus fair pricing, equals value.